
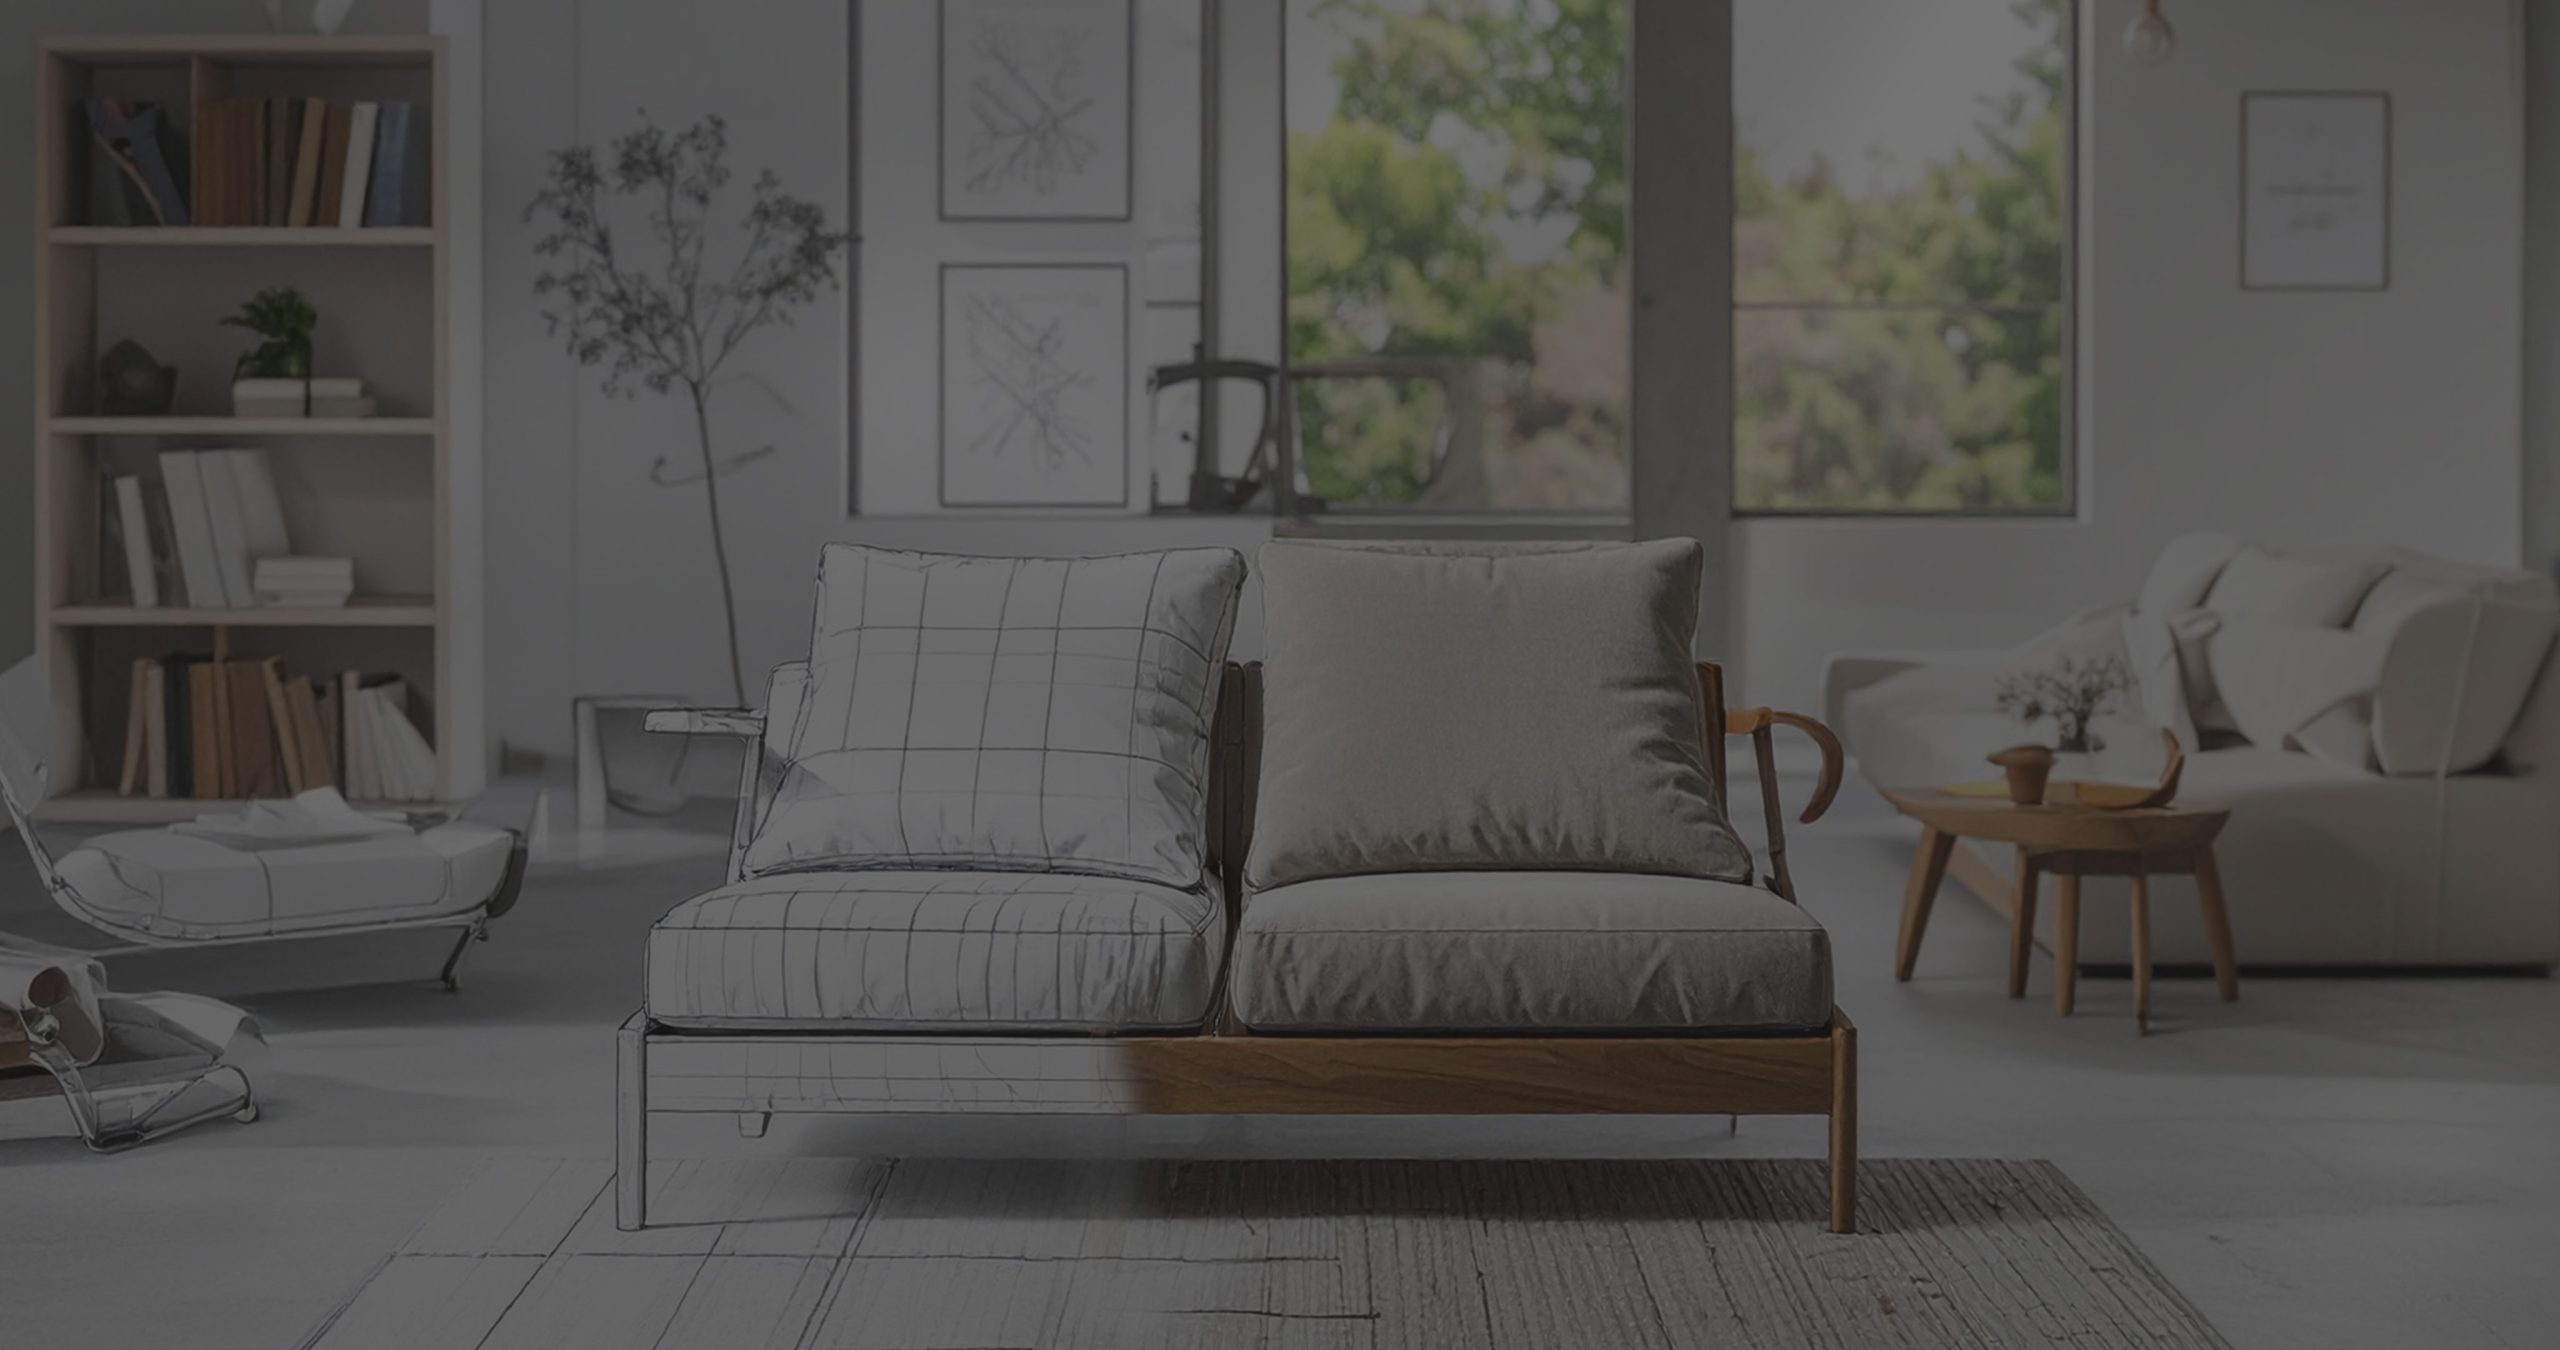
3D Furniture Models from Technical Files & 2D Images
For modern furniture retailers and manufacturers, digitization isn’t a luxury—it’s a necessity. Whether your catalog starts as CAD files or a collection of product photographs, transforming those inputs into high-quality 3D models gives you a powerful edge. From 360-degree views to immersive AR experiences, the digital twin of your product is now just as important as the real one.
This guide explores the methods, tools, and considerations for converting technical files or 2D images into 3D furniture models. It’s designed for retailers with marketing goals and manufacturers with technical assets alike—anyone looking to turn static files into dynamic visuals that sell.
From Technical Drawings to 3D Models
Technical files are often the best starting point for 3D modeling because they provide standardized, accurate geometry. CAD drawings and 3D engineering files deliver dimensional fidelity, clear specifications, and rich metadata, allowing for high-precision modeling without guesswork.
Pro Tip: When sharing technical drawings, include a bill of materials, finish references, and exploded views if available. These extras help reduce guesswork during 3D modeling and speed up delivery by minimizing back-and-forth clarification.
Commonly Supported File Types:
| File Type | Use Case | Key Advantage |
| .DWG / .DXF | Precise 2D and 3D drawings from AutoCAD | High drafting accuracy and widespread software compatibility |
| .STEP / .STP | 3D models for engineering and manufacturing | Cross-platform interoperability with parametric data retention |
| .IGES / .IGS | Legacy CAD data exchange | Supports complex geometry, especially curves and surfaces |
Workflow Overview:
| Step | Explanation | Estimated Timeline (Chair) |
| 1. File Validation | Review technical drawings for completeness—dimensions, exploded views, etc. | 0.5–1 day |
| 2. Modeling | Create accurate 3D geometry using CAD or DCC tools | 1–2 days |
| 3. Texturing & Materials | Apply surface textures, finishes, and bump maps using PBR workflows | 0.5–1 day |
| 4. Lighting & Rendering | Set up lighting and produce renders or real-time outputs | 0.5 day |
| 5. Final Quality Check | Cross-check geometry, scale, and materials against source files | 0.5 day |

Modeling from 2D Reference Images
Not every brand has CAD files on hand. Often, furniture companies rely on reference photography—especially for legacy collections or prototype products. While not as precise as technical drawings, this method can still deliver high-quality results with the right input and modeling expertise.
Image Requirements:
| Image Type | Purpose | Key Notes |
| Orthographic Angles | Establish overall geometry and proportions | Capture front, side, and top views with consistent lighting and lens type |
| Detail Close-Ups | Provide clarity on small components and craftsmanship | Include shots of joints, stitching, hardware, or unique design features |
| Material Swatches | Ensure accurate texturing during material application | Capture wood grain, fabric texture, gloss levels, etc., under neutral lighting |
| Context Shots | Help infer scale when no dimensions are available | Include a known object (e.g., A4 sheet) or shoot near a reference environment |
Ensuring high-quality images with consistent lighting and clear focus is crucial to achieving accurate 3D models from 2D references. The more comprehensive and detailed the photo set—including orthographic views, close-ups, and material samples—the easier it is to capture the true dimensions, textures, and unique features of the furniture. This attention to photographic detail minimizes guesswork during modeling and helps produce a final asset that is both visually compelling and dimensionally precise.
Pro Tip: When working from 2D images, consistent scale reference is everything. Include a ruler, known object (like an A4 sheet), or precise measurements in at least one photo. This small detail massively improves modeling accuracy—especially for proportions and joinery.

Workflow Overview:
When working with 2D reference images instead of technical drawings, the process requires a blend of advanced technology and skilled craftsmanship. High-quality photographs taken from multiple angles provide the foundation, but creating an accurate, detailed 3D model depends on expert interpretation and refinement. This workflow combines AI-assisted tools for initial shape generation with manual adjustments to capture subtle design details, textures, and material characteristics. The result is a photorealistic 3D model that maintains brand integrity and is ready for e-commerce, AR, or marketing use.
| Step | Explanation | Estimated Timeline (Chair) |
| 1. Image Collection | Gather comprehensive, high-quality photos covering orthographic angles, details, and materials | 1 day (client-side, depending on availability) |
| 2. Image Assessment | Review images for completeness and clarity; request additional shots if needed | 0.5–1 day |
| 3. Initial 3D Generation | Use AI-assisted tools to create a base 3D furniture model from images, providing rough geometry and proportions | 1–2 days |
| 4. Manual Refinement | Skilled artists refine geometry, add accurate details, and correct dimensions from reference photos | 3–5 days |
| 5. Texturing & Materials | Apply realistic textures and finishes based on material swatches and detail photos | 1–2 days |
| 6. Final Quality Check | Verify model accuracy, visual consistency, and optimize for intended use (web, AR, etc.) | 0.5–1 day |

AI-Assisted Modeling Tools:
Recent advances in AI have introduced powerful tools that can accelerate the creation of 3D furniture models from 2D images. Platforms like Tripo 3D, Prome AI, and Hyper 3D leverage machine learning algorithms to analyze photographs and estimate the shape, depth, and proportions of furniture pieces. This technology can dramatically reduce the initial time investment by producing quick 3D drafts or prototypes, which are especially useful when technical drawings are unavailable.
However, it’s important to remember that AI-generated models often serve as a starting point rather than a finished product. These tools may struggle with capturing intricate details, textures, or the subtle nuances of high-end materials. Manual refinement by experienced 3D artists remains essential to achieve the photorealism and brand consistency necessary for e-commerce or AR applications.
When working with AI-assisted tools, providing high-quality, consistent images and detailed reference material can significantly improve the output. This hybrid approach—combining AI speed with expert craftsmanship—offers furniture companies an efficient path to building impressive 3D assets without sacrificing quality.
Strategic Benefits of 3D Modeling for Furniture Brands
Converting technical assets or photographs into 3D furniture models isn’t just about visuals—it’s a business strategy. Here’s why:
Faster design cycles: Cut weeks from prototyping by visualizing changes in 3D before production.
Reduced sampling costs: Eliminate the need to build physical samples for every finish or colorway.
Enhanced customer experience: Let buyers explore, customize, and visualize furniture in AR before they click “buy.” Sales & marketing efficiency: Use the same 3D model across channels—from e-commerce to social media to configurators—maximizing asset ROI.
Global asset sharing: 3D models can be instantly shared with resellers, interior designers, or AR platforms, removing geographic friction.
Output Formats and Use Cases
Choosing the right file format for your 3D furniture models depends largely on how you plan to use them. For immersive augmented reality experiences and fast-loading web viewers, lightweight formats like .GLB and .GLTF provide excellent compatibility and performance. If your focus is animation or integration into real-time engines such as Unity or Unreal, formats like .FBX are the industry standard, offering robust support for complex rigs and textures. Meanwhile, universally supported formats like .OBJ are perfect for general 3D furniture visualization or archiving, and .STL files remain the go-to choice for 3D printing prototypes. Understanding these distinctions ensures your digital assets are optimized for their intended platforms, maximizing both usability and visual impact.
| Format | Use Case |
| .GLB / .GLTF | Ideal for AR previews, 3D web configurators, and fast-loading 3D e-commerce. |
| .FBX | Preferred for animation or integration with real-time engines like Unity or Unreal. |
| .OBJ | Widely compatible, often used for general <a href=/en/3d-service/3d-product-modeling/>3D visualization</a> or archiving. |
| .STL | Useful for 3D printing prototypes. |
Timeline and Pricing Considerations
The time and cost involved in creating 3D furniture models depend largely on the complexity of the piece, the quality of source materials, and the desired level of detail. Understanding these factors upfront helps set realistic expectations and ensures the final model meets both visual and functional requirements without surprises. Flexible pricing and timeline options allow for projects of all sizes, from single pieces to full catalogs.
Estimated Timelines:
| Model Complexity | Description | Estimated Timeline | Factors Influencing Timeline |
| Basic Models | Simple furniture pieces like chairs, stools, or small tables with minimal texture | 2–4 business days | Clear technical files, few materials or textures |
| Intermediate Models | Items with moderate complexity such as dining tables, desks, or chairs with fabric upholstery | 5–8 business days | Multiple materials, detailed textures, and minor assembly details |
| Complex Models | Large or modular furniture, sofas with intricate designs, recliners, or multi-material pieces | 9–12 business days | High-detail textures, complex geometry, and multiple finishes |
| Custom or Bespoke Models | Highly detailed pieces requiring unique craftsmanship details, custom finishes, or special effects | 2+ weeks or more | Extensive detailing, multiple rounds of revision, advanced rendering |
Pricing Models:
Bundled packages or subscription plans offer significant savings on a per-model basis, especially for clients managing large or ongoing catalogs. These options provide predictable budgeting, priority scheduling, and tailored service levels, making them ideal for retailers and manufacturers looking to scale their 3D asset production efficiently.
| Pricing Model | Description | Typical Rate / Range | Best For |
| Hourly | Charges based on actual work time | CHF 35 – CHF 90 per hour | Projects with variable scope or quick turnarounds |
| Per-Model | Fixed price per finished 3D model | CHF 150 – CHF 1,000+ per model | Defined projects or standard complexity assets |
| Bundled Packages | Pre-purchased sets of models at discounted rates | Varies by volume and detail | Large catalogs or recurring orders |
| Subscription Plans | Monthly or yearly plans for continuous work | Custom pricing based on usage | High-volume clients needing steady output |
A Future-Proof Investment
3D furniture models are more than static assets—they’re dynamic tools for sales, marketing, and product development. Whether you’re starting from high-resolution photographs or technical CAD files, the right 3D modeling strategy ensures you’re ready for the next wave of retail: immersive, interactive, and immediate.
For manufacturers and retailers, the decision to digitize their furniture product catalogs isn’t just about aesthetics—it’s about staying competitive in a world where buyers expect to see, rotate, configure, and visualize furniture on their terms. Contact us today to schedule a free consultation and explore how to bring your products to life in 3D.
 Beds & Headboards furniture
 Chairs & Seating furniture
 Tables & Desks furniture
 Storage & Organization furniture
 Sofas & Couches furniture